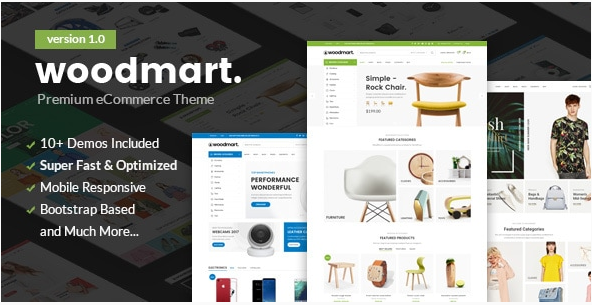
Building an eCommerce store has never been easier, especially with the WoodMart theme. WoodMart is a powerful, flexible, and feature-rich theme designed specifically for WooCommerce users. Whether you’re a seasoned web developer or just starting, this theme makes it simple to create a professional-looking and fully functional online store. In this article, we will guide you through the process of building a store with WoodMart, highlighting key features, customization options, and best practices to help you get the most out of this theme.

Step 1: Installing the WoodMart Theme
Before you begin designing your store, the first step is installing the WoodMart theme. Here’s how you can do it:
- Purchase and Download WoodMart
Go to the official WoodMart theme page on ThemeForest and purchase the theme. Once purchased, download the theme files to your computer. - Install the Theme in WordPress
- Log in to your WordPress dashboard.
- Navigate to Appearance > Themes and click Add New.
- Upload the theme ZIP file you downloaded and click Install Now.
- Once installed, click Activate to set WoodMart as your active theme.
- Install Required Plugins
After activating WoodMart, you’ll be prompted to install essential plugins, including WooCommerce and the WoodMart core plugin. These plugins enhance the functionality of your store, so be sure to install and activate them.
Step 2: Import a Demo Store (Optional)
One of the standout features of WoodMart is its one-click demo import. If you want to get started quickly, you can import a demo store that already includes layouts, products, and settings similar to what you need for your store.
- Navigate to WoodMart Settings
Go to WoodMart > Demo Import in your WordPress dashboard. - Choose Your Demo
Browse through the available demos that fit your store’s niche. There are demos for fashion, electronics, furniture, and more. Select the one you like and click Import. - Customize the Demo Content
Once the demo is imported, you can replace the placeholder content with your own products, images, and branding. The demo serves as a great foundation to speed up your setup process.
Step 3: Customize Your Store Design
WoodMart offers an extensive set of customization options that allow you to adjust the layout, colors, fonts, and more to create a unique look for your store.
- Customize the Header and Footer
Go to Appearance > Customize to adjust the header layout, footer settings, and more. WoodMart includes multiple header styles, including transparent, sticky, and minimalist options. You can also add widgets, logos, and contact details to the footer. - Modify the Product Pages
WoodMart provides powerful customization tools for product pages. You can adjust how products are displayed, including adding product variations, reviews, and related product sliders. You can also choose from various product page templates. - Design the Product Catalog
Customize the product catalog page by choosing between grid or list views. You can also adjust how many products are displayed per row, the number of products per page, and how product filters are shown to customers.
Step 4: Add and Manage Products
Once your store design is set up, it’s time to add products. WoodMart makes it easy to manage products with WooCommerce’s built-in tools.
- Add New Products
- Navigate to Products > Add New in your WordPress dashboard.
- Add product details, including title, description, price, SKU, and stock status.
- Upload high-quality product images to make your items stand out.
- Set up product categories and tags to organize your inventory.
- Configure Product Variations
If you sell products with different options (sizes, colors, etc.), you can easily create product variations in WoodMart. Just choose the Variable Product option and set up each variation with its price, image, and stock. - Set Up Inventory and Shipping
Manage your inventory and shipping options through WooCommerce settings. You can configure shipping methods, taxes, and inventory tracking directly within the WoodMart theme settings.
Step 5: Configure Payment and Checkout Options
To accept payments, you’ll need to integrate payment gateways with WooCommerce. WoodMart supports a variety of payment options, including PayPal, Stripe, and bank transfers.
- Enable Payment Gateways
Go to WooCommerce > Settings > Payments to enable and configure the payment methods you want to offer. WoodMart supports popular gateways like PayPal, Stripe, and Authorize.net. - Customize the Checkout Process
Customize the checkout page to streamline the shopping experience for customers. You can enable guest checkout, offer discount codes, and add custom fields to collect specific information.
Step 6: Optimize Your Store for Speed and SEO
Performance and SEO are crucial for any eCommerce store, and WoodMart has built-in features to help with both.
- Speed Optimization
WoodMart is optimized for fast loading times, but you can further enhance speed by optimizing images and enabling caching with plugins like W3 Total Cache. - SEO Settings
WoodMart is designed with SEO in mind. You can configure meta titles, descriptions, and product schema markup to improve your store’s visibility in search engines.
Step 7: Launch and Market Your Store
Once your store is set up and products are added, it’s time to launch! But before you do, make sure to test your store’s functionality and ensure everything is working smoothly.
- Test the User Experience
Test your store from a customer’s perspective. Ensure that the checkout process is smooth, all links are working, and the store is responsive on all devices. - Marketing Your Store
Start promoting your store using social media, email campaigns, and paid advertising. WoodMart supports various social media integrations, so you can easily display Instagram feeds and social share buttons.
